TubeRA type handguard with integrated handguard and outer barrel.
The tube is made of 3K carbon pipe. The handguard base and barrel nut are
EN AW7075-T651, muzzle is made of POM.
The screws at the base of the handguard are compatible with Tokyo Marui and RETRO ARMS toy pitch (M32xP1.5).
Total length is 350mm (measured end to end: 344mm), and the total weight of all parts is 311g.
The tube outer diameter is Φ39mm and the inner diameter is Φ34mm.
----------------------------------------------------------------------------------------------------

This handguard roughly consists of the outer barrel base, the tube body, and the contents.
12 and 13 are silencer baffles, and 14 is a barrel spacer.
By rearranging the contents, it can be adapted to a variety of settings.
----------------------------------------------------------------------------------------------------
 This is a diagram of the set including a 363mm inner barrel.
Since the inner barrel reaches the muzzle, the silencer baffle cannot be used effectively.
You can eliminate any play by sandwiching the front and back with barrel spacers.
----------------------------------------------------------------------------------------------------

This is a picture of the 247mm inner barrel installed.
The silencer baffle is designed to function at full capacity, and by placing barrel spacers at the tip and midpoint, you can effectively eliminate backlash.
There is also an O-ring at the base of the outer barrel to eliminate any backlash, so if the inner barrel is 89mm or longer, it can be held in the center.
----------------------------------------------------------------------------------------------------

This is a little tricky, but the threads at the base of the outer barrel (shown in yellow in the image above) are M16xP1.0 right-hand threads, the same standard as the Tokyo Marui SOCOM Mk23 suppressor. By using an M14 thread adapter or extension adapter for the SOCOM Mk23, it is possible to mount a tracer with an outer diameter of 34mm or less inside the handguard without any modification.
----------------------------------------------------------------------------------------------------

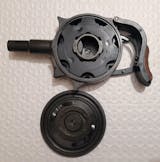
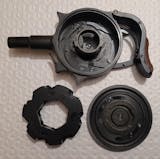
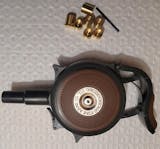
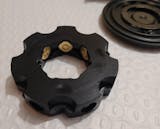
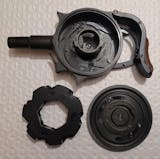
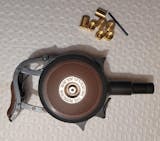
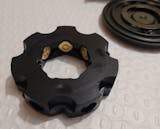
The base of the outer barrel is equipped with a unique chamber pressure tension adjustment and fixing function.
From here on, we will explain how to assemble using the above part numbers.
(The photo shows the RETRO ARMS CNC 3K-carbon Outer Barrel AR15, but it is the same shape.)

Attach the three screws (9) to the base. These screws will engage with the receiver to prevent rotation .

Insert ⑤, ⑥, and ⑪ in that order.
The wedge clamp (⑥) has a specific orientation, with the tapered surface indicated by the green arrow facing the muzzle.
---------------------------------------------------------------------------------------------------- 
The O-ring (11) is the company's CNC Hop-Up Chamber AR15 BASIC
Or CNC Hop Up Chamber AR15 PRO dimensions are optimized,
The distance from the gearbox contact surface to the tip of the chamber is 52.2 mm.
If you use the slightly shorter CNC Hop Up Chamber AR15 ULTRA, you will need a special wedge clamp .
When using a chamber made by another manufacturer, an additional O-ring may be required to match this dimension, so please prepare it separately.
Slightly push the wedge clamp (⑥) so that the retaining screw (⑧) fits over the step indicated by the red arrow.
Secure it in place by attaching the two retaining screws (8) on the left and right.
----------------------------------------------------------------------------------------------------
After inserting the adjustment screws (7) in two places on the left and right, secure them with the barrel nut and assemble the chamber and gearbox set.
Finally, tighten screw ⑦ while checking the gap between the chamber and the gearbox, and once they are in close contact, tighten them about half a turn to complete the adjustment. Apply a locking agent to this screw.
According to the manufacturer's announcement, it is okay to apply up to 0.5 N·m to the adjustment screw (7), but in reality, if you apply 0.5 N·m, the screw will go so deep that it will pierce the inner barrel and damage the threads, so stop turning it once the chamber and gearbox are in proper contact and tension is applied.
----------------------------------------------------------------------------------------------------
 Next, we will explain how to adjust the adjustment screw (7) if it is hidden by the barrel nut.
As shown in the photo above, if the barrel nut is too long, the wrench will not fit.
This product also has an adjustment screw that is hidden by the barrel nut, so adjustments are made using this method.

 In this case, temporarily assemble the outer barrel and chamber to the upper receiver without attaching the barrel nut.

Next, we will assemble the lower receiver, including the gearbox.
After that, while pressing the outer barrel firmly against the upper receiver, turn the adjustment screw (7) little by little until you find a position where there is just no gap between the "outer barrel" and the "upper receiver" (part indicated by the red arrow in the photo).
Once you find it, turn the adjustment screw (7) half a turn to complete the adjustment.
All that's left to do is assemble the handguard and secure the outer barrel with the barrel nut.
*As this is an overseas product, there may be variations in the finish and color unevenness.
In addition, minor specification changes may occur without prior notice.
*Except in cases where the product is damaged or cannot be installed, causing serious problems with functionality.
Returns will not be accepted.


![[RETRO ARMS] CNC Handguard TubeRA 3K carbon AR15 39x350 mm](http://rock-et.jp/cdn/shop/files/RETRO-7622_1024x1024.png?v=1750321435)
![[RETRO ARMS] CNC Handguard TubeRA 3K carbon AR15 39x350 mm](http://rock-et.jp/cdn/shop/files/RETRO-7622_13_1024x1024.jpg?v=1750321435)
![[RETRO ARMS] CNC Handguard TubeRA 3K carbon AR15 39x350 mm](http://rock-et.jp/cdn/shop/files/RETRO-7622_12_1024x1024.png?v=1750321435)
![[RETRO ARMS] CNC Handguard TubeRA 3K carbon AR15 39x350 mm](http://rock-et.jp/cdn/shop/files/RETRO-7622_11_1024x1024.png?v=1750321435)
![[RETRO ARMS] CNC Handguard TubeRA 3K carbon AR15 39x350 mm](http://rock-et.jp/cdn/shop/files/RETRO-7622_10_1024x1024.png?v=1750321435)
![[RETRO ARMS] CNC Handguard TubeRA 3K carbon AR15 39x350 mm](http://rock-et.jp/cdn/shop/files/RETRO-7622_9_1024x1024.png?v=1750321435)
![[RETRO ARMS] CNC Handguard TubeRA 3K carbon AR15 39x350 mm](http://rock-et.jp/cdn/shop/files/RETRO-7622_8_1024x1024.jpg?v=1750321435)
![[RETRO ARMS] CNC Handguard TubeRA 3K carbon AR15 39x350 mm](http://rock-et.jp/cdn/shop/files/RETRO-7622_6_1024x1024.jpg?v=1750321435)
![[RETRO ARMS] CNC Handguard TubeRA 3K carbon AR15 39x350 mm](http://rock-et.jp/cdn/shop/files/RETRO-7622_7_1024x1024.jpg?v=1750321435)
![[RETRO ARMS] CNC Handguard TubeRA 3K carbon AR15 39x350 mm](http://rock-et.jp/cdn/shop/files/RETRO-7622_5_1024x1024.png?v=1750321435)
![[RETRO ARMS] CNC Handguard TubeRA 3K carbon AR15 39x350 mm](http://rock-et.jp/cdn/shop/files/RETRO-7622_4_1024x1024.jpg?v=1750321435)
![[RETRO ARMS] CNC Handguard TubeRA 3K carbon AR15 39x350 mm](http://rock-et.jp/cdn/shop/files/RETRO-7622_3_1024x1024.jpg?v=1750321435)
![[RETRO ARMS] CNC Handguard TubeRA 3K carbon AR15 39x350 mm](http://rock-et.jp/cdn/shop/files/RETRO-7622_2_1024x1024.jpg?v=1750321435)
![[RETRO ARMS] CNC Handguard TubeRA 3K carbon AR15 39x350 mm](http://rock-et.jp/cdn/shop/files/RETRO-7622_1_1024x1024.jpg?v=1750320814)
![[RETRO ARMS] CNC Handguard TubeRA 3K carbon AR15 39x350 mm](http://rock-et.jp/cdn/shop/files/RETRO-7622_medium.png?v=1750321435)
![[RETRO ARMS] CNC Handguard TubeRA 3K carbon AR15 39x350 mm](http://rock-et.jp/cdn/shop/files/RETRO-7622_13_medium.jpg?v=1750321435)
![[RETRO ARMS] CNC Handguard TubeRA 3K carbon AR15 39x350 mm](http://rock-et.jp/cdn/shop/files/RETRO-7622_12_medium.png?v=1750321435)
![[RETRO ARMS] CNC Handguard TubeRA 3K carbon AR15 39x350 mm](http://rock-et.jp/cdn/shop/files/RETRO-7622_11_medium.png?v=1750321435)
![[RETRO ARMS] CNC Handguard TubeRA 3K carbon AR15 39x350 mm](http://rock-et.jp/cdn/shop/files/RETRO-7622_10_medium.png?v=1750321435)
![[RETRO ARMS] CNC Handguard TubeRA 3K carbon AR15 39x350 mm](http://rock-et.jp/cdn/shop/files/RETRO-7622_9_medium.png?v=1750321435)
![[RETRO ARMS] CNC Handguard TubeRA 3K carbon AR15 39x350 mm](http://rock-et.jp/cdn/shop/files/RETRO-7622_8_medium.jpg?v=1750321435)
![[RETRO ARMS] CNC Handguard TubeRA 3K carbon AR15 39x350 mm](http://rock-et.jp/cdn/shop/files/RETRO-7622_6_medium.jpg?v=1750321435)
![[RETRO ARMS] CNC Handguard TubeRA 3K carbon AR15 39x350 mm](http://rock-et.jp/cdn/shop/files/RETRO-7622_7_medium.jpg?v=1750321435)
![[RETRO ARMS] CNC Handguard TubeRA 3K carbon AR15 39x350 mm](http://rock-et.jp/cdn/shop/files/RETRO-7622_5_medium.png?v=1750321435)
![[RETRO ARMS] CNC Handguard TubeRA 3K carbon AR15 39x350 mm](http://rock-et.jp/cdn/shop/files/RETRO-7622_4_medium.jpg?v=1750321435)
![[RETRO ARMS] CNC Handguard TubeRA 3K carbon AR15 39x350 mm](http://rock-et.jp/cdn/shop/files/RETRO-7622_3_medium.jpg?v=1750321435)
![[RETRO ARMS] CNC Handguard TubeRA 3K carbon AR15 39x350 mm](http://rock-et.jp/cdn/shop/files/RETRO-7622_2_medium.jpg?v=1750321435)
![[RETRO ARMS] CNC Handguard TubeRA 3K carbon AR15 39x350 mm](http://rock-et.jp/cdn/shop/files/RETRO-7622_1_medium.jpg?v=1750320814)


